corou : 완성
완성
오늘 성준님이 프론트엔드 UI부분을 마저 마무리해줌으로 드디어 완성이다. 약간의 놓친 부분들이 있을 수도 있겠다는 생각은 들지만, 꽤 만족한다.
SQL, typescript, typeORM, tsyringe 등등 새로 배운 것들을 사용했으며, 아키텍쳐를 지난 프로젝트보다 짜임새있게 짰다고 생각한다.
마지막에 성준님이랑 맞춰볼 때, 루틴 수정 로직과 프로필 수정 로직을 조금 손봤다. 루틴을 수정할 때 단계의 수를 변경할 수 있는데, 기존의 단계 수와 새로 바꾸는 단계 수에 따라서 로직을 다르게 처리해야했다.
1
2
3
4
5
6
7
8
9
10
11
12
13
14
15
16
17
18
19
20
21
22
23
24
25
26
27
28
29
30
31
32
33
34
35
36
37
38
39
40
41
42
43
44
45
46
47
48
49
50
51
52
53
54
55
56
57
58
59
60
61
62
63
64
65
66
67
68
69
70
71
72
73
74
75
76
77
    async updateRoutine(
        user_key: number,
        routine_key: number,
        routine_name: string,
        steps: number,
        for_age: number,
        for_gender: "M" | "F" | "A",
        for_skin: number,
        for_problem: Array<string>,
        details: any
    ): Promise<Routine> {
        return this.dataSource.transaction(async transactionalEntityManager => {
            const foundRoutine = await this.routineRepository.findOne({ where: { routine_key }, relations: ['user'] });
            if (!foundRoutine) {
                throw new Error('루틴을 찾지 못했습니다.');
            }
            if (foundRoutine.user.user_key !== user_key) {
                throw new Error('수정 권한이 없습니다.');
            }
            const old_steps = foundRoutine.steps;
            await transactionalEntityManager.update(Routine, { routine_key }, {
                routine_name,
                steps,
                for_gender,
                for_age,
            })

            await this.routineSkinRelationService.deleteRoutineSkinRelation(routine_key, transactionalEntityManager)
            await this.routineSkinRelationService.addRoutineSkinRelation(
                routine_key,
                for_skin,
                transactionalEntityManager
            );
            for (const problem of for_problem) {
                await this.routineSkinRelationService.addRoutineSkinRelation(
                    routine_key,
                    Number(problem),
                    transactionalEntityManager
                );
            }
            if (steps <= old_steps) {
                for (let i = 1; i <= steps; i++) {
                    await this.routineDetailService.updateRoutineDetail(i, routine_key, details[i - 1].item_key, details[i - 1].step_name, details[i - 1].description, transactionalEntityManager);
                }
                if (steps < old_steps) {
                    for (let i = steps + 1; i <= old_steps; i++) {
                        await this.routineDetailService.deleteRoutineDetail(i, routine_key);
                    }
                }
            } else {
                for (let i = 1; i <= old_steps; i++) {

                    await this.routineDetailService.updateRoutineDetail(i, routine_key, details[i - 1].item_key, details[i - 1].step_name, details[i - 1].description, transactionalEntityManager);
                }
                for (let i = old_steps + 1; i <= steps; i++) {
                    await this.routineDetailService.createRoutineDetail(i, routine_key, details[i - 1].item_key, details[i - 1].step_name, details[i - 1].description, transactionalEntityManager)
                }
            }
            const updatedRoutine = await transactionalEntityManager.findOne(Routine, { where: { routine_key } });
            if (!updatedRoutine) {
                throw new Error('루틴 업데이트에 오류가 발생했습니다.')
            }
            const total = await transactionalEntityManager
                .createQueryBuilder()
                .select('SUM(item_price)', 'total_price')
                .from('routine_detail', 'rd')
                .innerJoin('item', 'item', 'rd.item_key = item.item_key')
                .where('rd.routine_key = :routine_key', { routine_key: updatedRoutine.routine_key })
                .getRawOne();

            updatedRoutine.price_total = total.total_price;

            await transactionalEntityManager.save(Routine, updatedRoutine);

            return updatedRoutine;
        })
    }
그리고, findOneBy메소드를 쓰는 것 보다 findOne을 쓰고 relations를 써야 다른 엔터티의 관계있는 인스턴스를 가져올 수 있다는 것을 알았다.
Overview
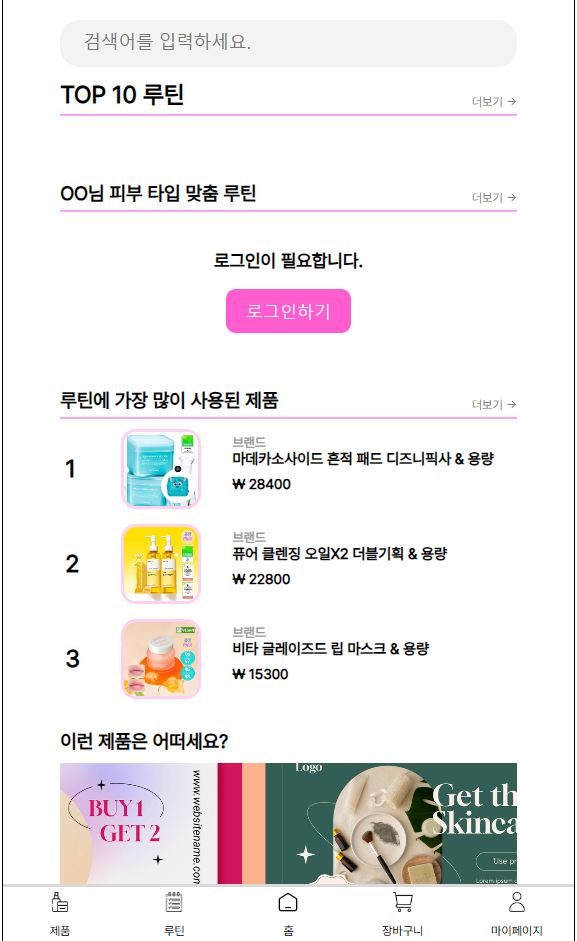
메인 페이지는 현재 등록된 루틴이 없는 상태에서 켜서 TOP10과 맞춤 루틴은 뜨지 않지만, 루틴이 등록됨에 따라 뜨게 되어있다.
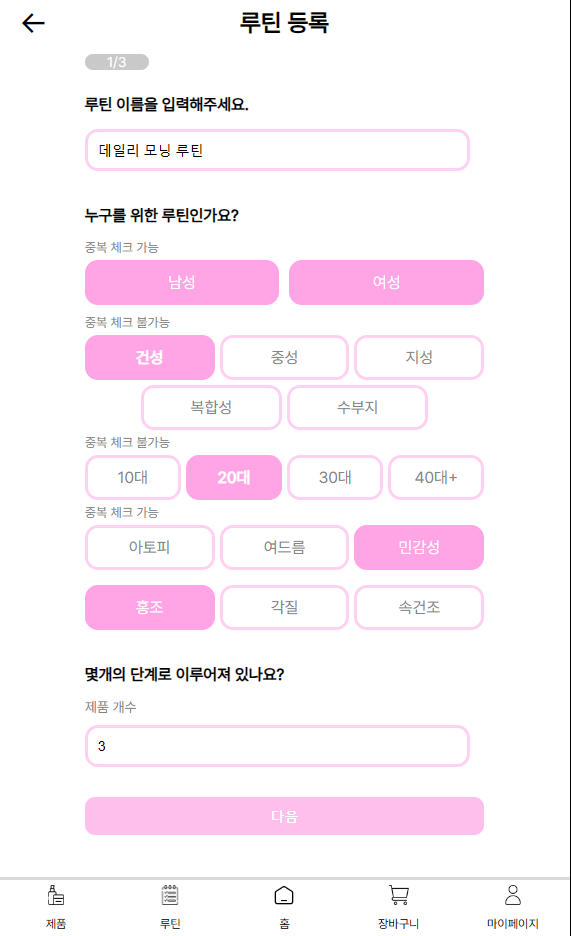
루틴 등록은 위와 같이 하면 된다.
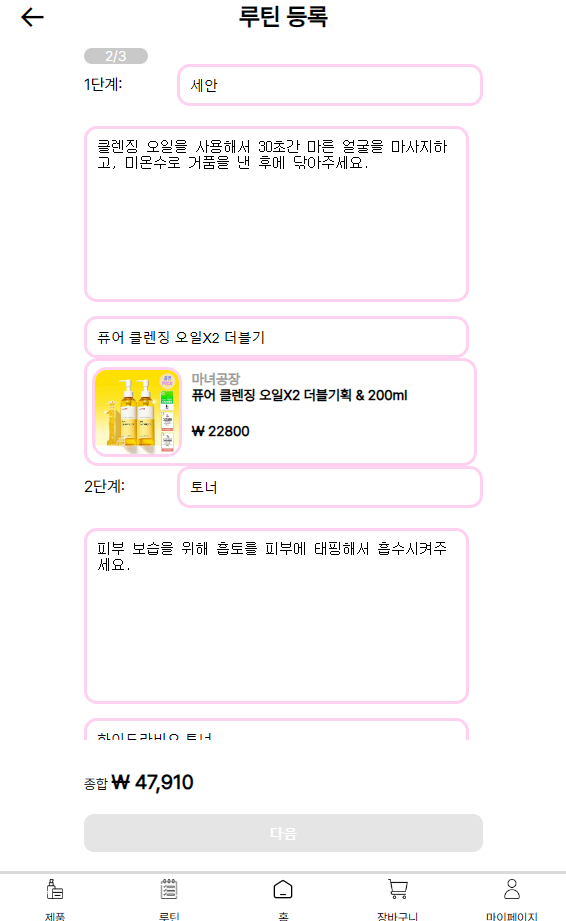
넘어가면, 위와 같이 각 단계별 설명을 입력하고 해당 단계에 사용할 제품을 선택하면 된다.
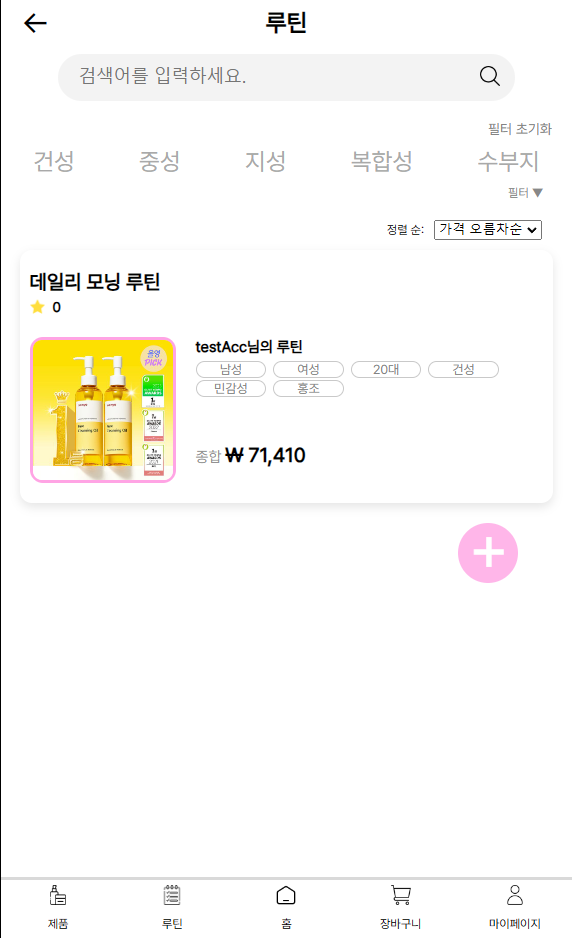
등록을 하고 나면 전체 목록에서 루틴이 생긴 걸 볼 수 있다.
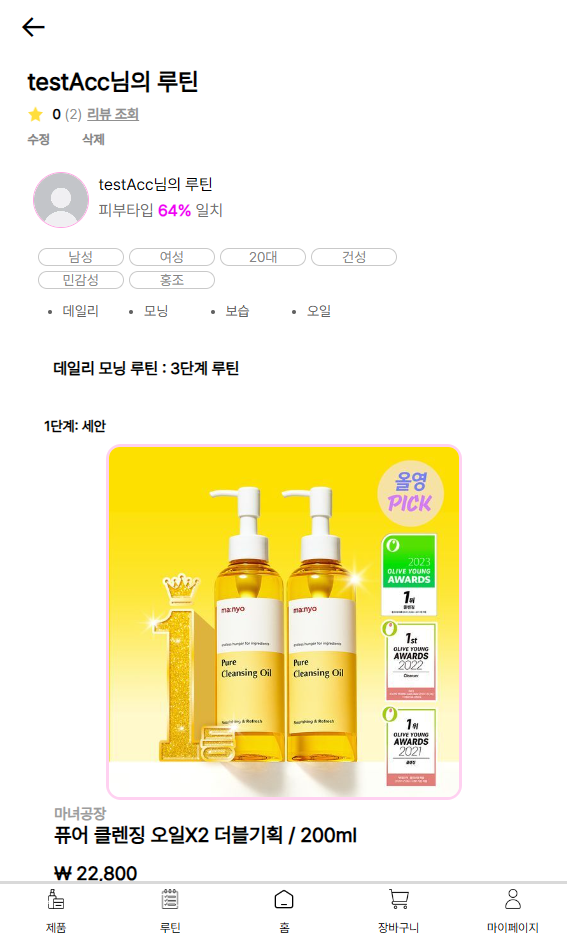
루틴을 눌러 상새 페이지로 가면 해당 루틴에 적합한 피부 타입과 tag등이 있다.
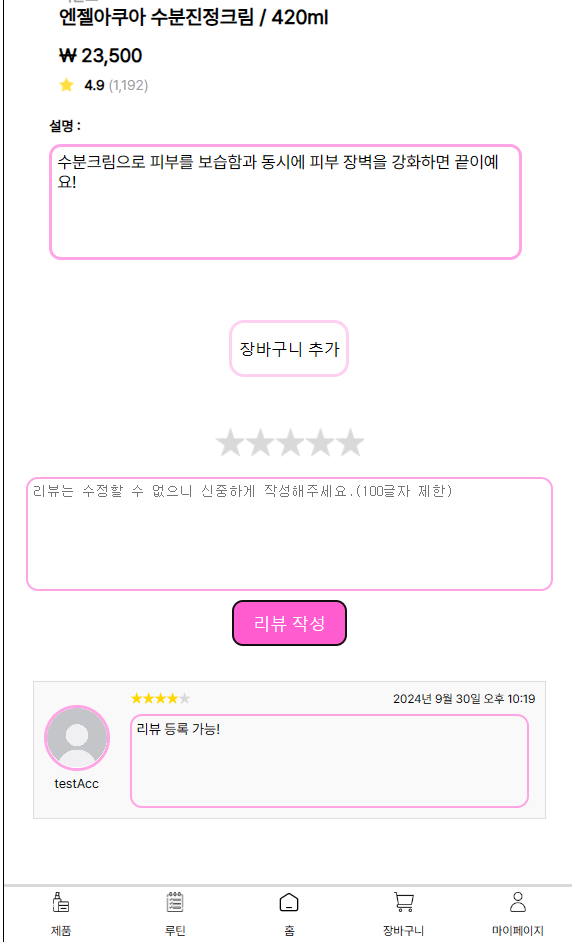
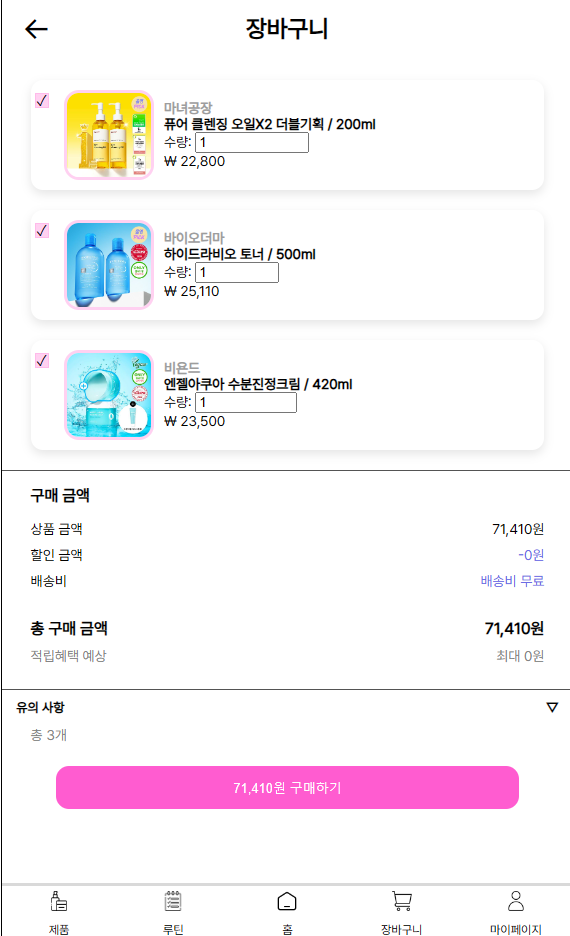
리뷰를 남길 수 있으며, 여기서 ‘장바구니 추가’를 누르면 해당 루틴에 사용된 모든 제품이 장바구니에 추가된다.
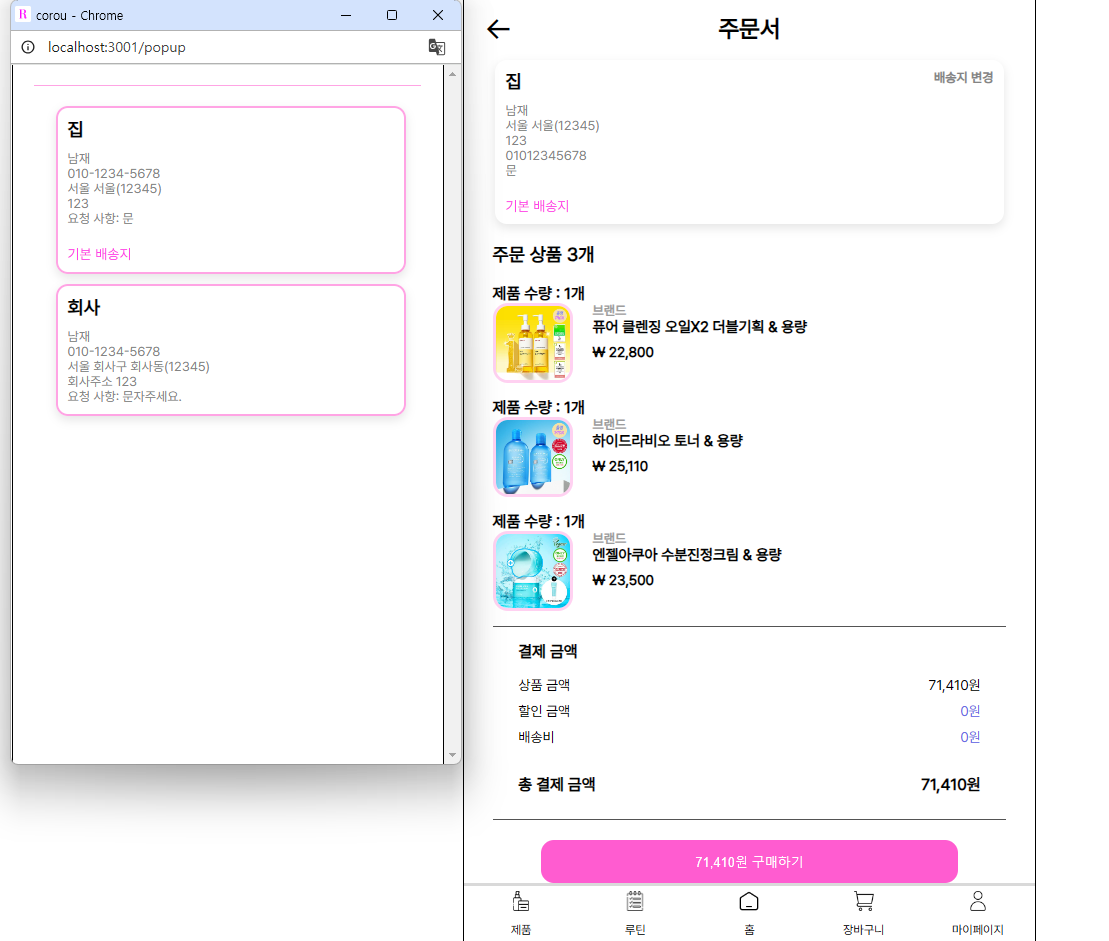
장바구니에서 주문서로 넘어가면 미리 입력한 주소 중 하나를 선택할 수 있다 (변경하지 않을 시 기본 배송지로 등록 된 주소가 자동으로 들어가있다).
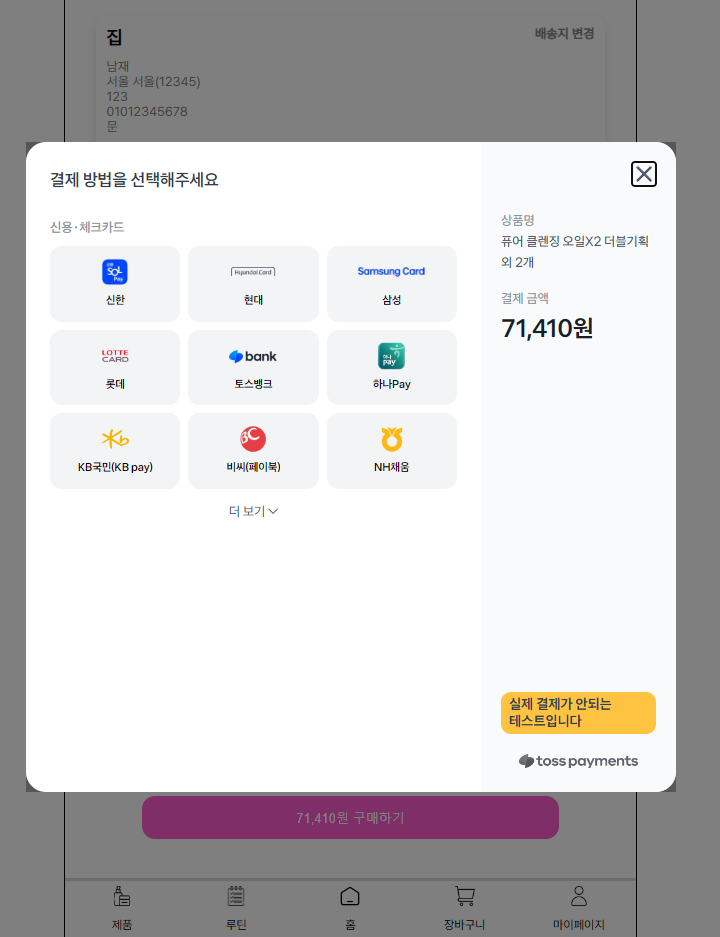
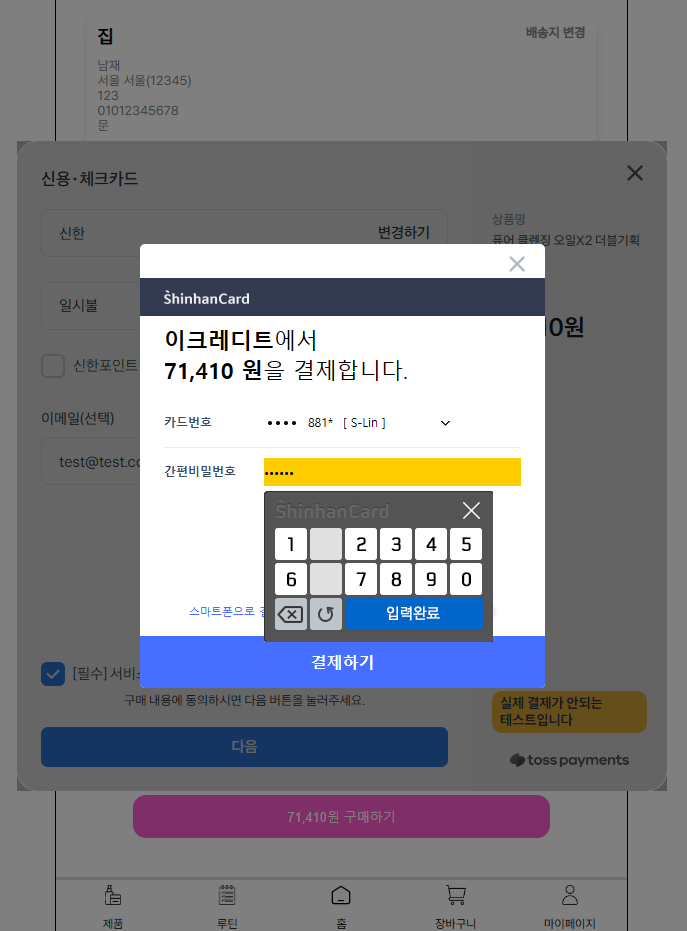
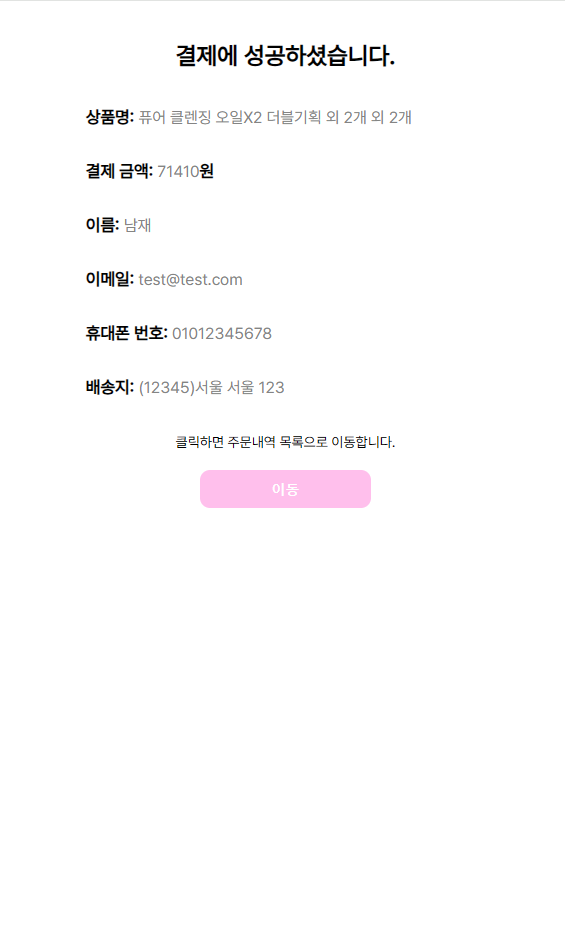
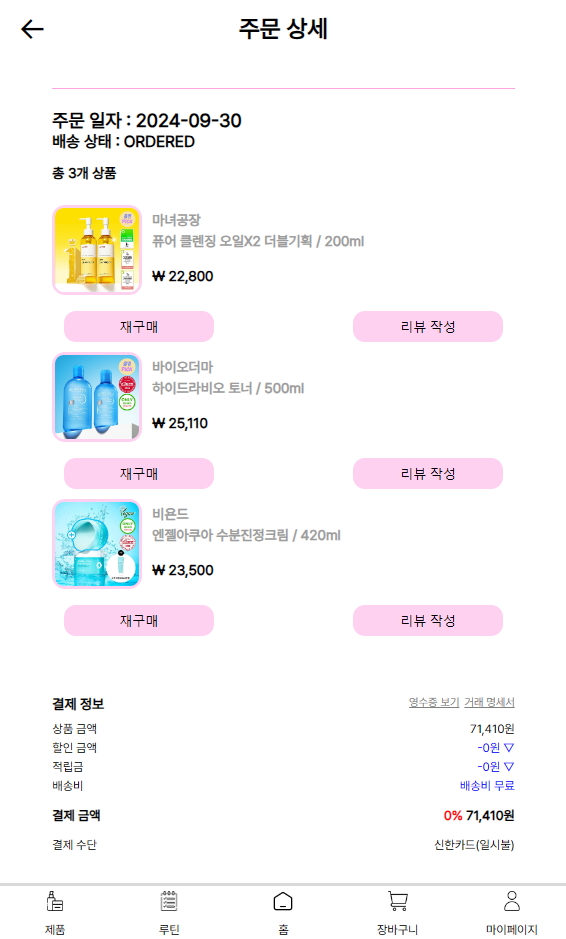
결제가 성공적으로 이루어지면 내역 정보를 볼 수 있다.
루틴에서 가져오지 않고, 제품을 직접 하나씩 선택해서 구매도 가능하다.

